DSLR Astrophotography
Your camera is more capable than you think. Whether it's a DSLR that's been gathering dust since you went smartphone, or a modern mirrorless body, you already own one of the most versatile tools in amateur astronomy. This page will show you what's possible — from your very first star photo to the sweeping arch of the Milky Way.
Getting started — what you need
The beauty of DSLR and mirrorless astrophotography is that you can start with what you already own. At its simplest, you need:
- A DSLR or mirrorless camera with manual mode — any modern body will do
- A sturdy tripod — essential for any exposure longer than a second
- A wide-angle lens — ideally f/2.8 or faster; something in the 14–24mm range is ideal for wide sky shots
- A remote shutter release or intervalometer — to avoid camera shake when triggering exposures
Always shoot in RAW rather than JPEG. RAW files retain far more data and give you much greater flexibility when processing your images later.
Your first night sky shots — the basics
Switch your camera to manual mode, disable autofocus (focusing on stars at night will need to be done manually, using Live View zoomed in on a bright star), and turn off any image stabilisation if your lens has it.
A good starting point for night sky settings is:
- Aperture: as wide as your lens allows (f/1.8–f/2.8 ideally)
- ISO: 1600–3200 to start — adjust based on your results
- Shutter speed: keep it short enough to avoid star trails (see below)
- White balance: set manually or shoot RAW and adjust in processing
Avoiding star trails — the 500 Rule
Because the Earth rotates, stars will appear to streak across your image if your shutter stays open too long. A useful starting guide is the 500 Rule: divide 500 by your lens's focal length to find the maximum exposure time in seconds before stars start to trail. For example, a 25mm lens gives you a maximum of 20 seconds. d If you use a crop-sensor camera, multiply the focal length by your crop factor (typically 1.5 or 1.6) before dividing. As a rule of thumb, shorter is safer — you can always stack multiple frames later.
Milky Way photography
In the UK, the Milky Way core is visible from roughly March to October, with the best views coming between May and August when the galactic centre rises in the south-southeast after dark. Outside those months the core sits below the horizon during night-time hour.
A good starting point is 30-second exposures at ISO 1600, using the widest aperture your lens allows. Combine this with a dark location away from town and you'll be amazed at what shows up on your camera screen. Apps like PhotoPills and Stellarium are invaluable for planning — they'll show you exactly where the Milky Way will be at any time and location.
A simple but effective workflow:
- Find a dark site (check Light Pollution Map: www.lightpollutionmap.info)
- Allow 20 minutes for your eyes — and your camera — to adjust to the dark
- Frame your shot with an interesting foreground — trees, a building, water
- Focus manually using Live View on a bright star
- Take a test shot, review, adjust ISO and shutter speed, and shoot
Star trackers — longer exposures, cleaner images
The single biggest upgrade you can make to wide-field astrophotography is a star tracker (sometimes called a sky tracker). This small, portable device sits between your camera and tripod head and slowly rotates to match the movement of the night sky, counteracting the Earth's rotation.
A star tracker allows you to take much longer exposures without star trails, dramatically improving the quality of your images. Instead of being limited to 15–25 second exposures, you can capture several minutes of light — revealing far more detail in the Milky Way and reducing the noise that plagues short high-ISO shots.
Popular and affordable options include the Sky-Watcher Star Adventurer, the iOptron SkyGuider Pro, and the Vixen Polarie. All are compact enough to fit in a camera bag. You'll need to polar align the tracker on Polaris before each session, but with a little practice this becomes quick and straightforward.
Star trails
Star trails are one of the most visually striking results you can achieve with just a camera and tripod — no tracker needed. By using long exposures or stacking many shorter frames together, you can vividly capture the rotation of the Earth as the stars trace graceful arcs across the sky.
Point your camera north towards Polaris and the stars will form concentric circles around the pole. Point it in any other direction and you'll get sweeping curved trails. There are two approaches:
- Single long exposure: leave the shutter open for 20–40 minutes. Simple, but noise can build up
- Image stacking: take dozens of 30-second frames and combine them in software such as StarStaX (free) or Sequator (free). This gives cleaner results with less noise and lets you stop if clouds roll in
Set the camera to its lowest native ISO (typically 100–200), use a mid-range aperture (f/4–f/8 for sharper trails), and let it run. The longer you shoot, the longer the trails.
Modified cameras — unlocking hidden colour
Here's something many photographers don't know: your camera is deliberately blocking some of the most spectacular colour in the night sky.
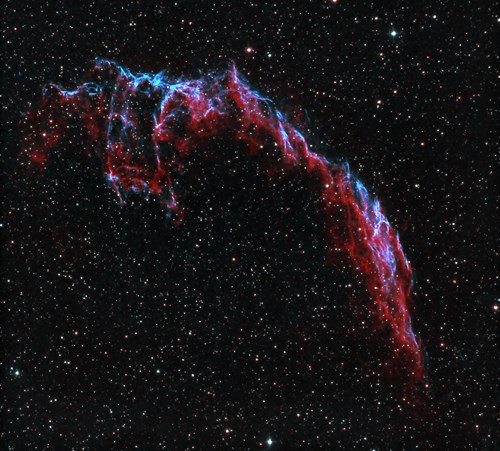
Standard DSLR and mirrorless cameras contain an infrared cut filter that blocks a deep red wavelength of light called Hydrogen-Alpha (Ha). This is the precise colour emitted by vast clouds of glowing hydrogen gas in nebulae — the pink and red regions you see in astrophotos of objects like the Orion Nebula, the Rosette, or the Milky Way's star-forming regions.
An astrophotography camera conversion replaces the stock filter with one that passes the deep red Ha wavelength through to the sensor, dramatically increasing your camera's sensitivity to emission nebulae. The result is that structures invisible to a standard camera suddenly reveal themselves in your images.
There are two main routes:
- Ha conversion: the filter is replaced with one optimised specifically for astrophotography. This increases Hydrogen-Alpha sensitivity approximately four times compared to a stock camera. The camera can still be used for daytime photography with a custom white balance setting.
- Full-spectrum conversion: the filter is removed entirely, allowing UV, visible, and infrared light all through. More versatile but requires additional filters for both day and night use.
You can send your existing camera body to a specialist conversion service — several UK providers offer this — or purchase a pre-modified body second-hand. It's not a step for beginners, but for those who've caught the astrophotography bug it opens up a whole new dimension of what's possible.
Useful apps and software
- PhotoPills — planning Milky Way rises, moon phases, golden hour
- Stellarium (free) — sky map and planning tool
- Clear Outside (free) — UK-focused cloud and seeing forecast
- Sequator (free) — stacking for Milky Way and star trails
- StarStaX (free) — star trail stacking
- Siril (free) — more advanced image stacking and processing
- Lightroom / Adobe Camera Raw — general processing of RAW files
Want to learn more?
Our members include experienced DSLR astrophotographers who are happy to share their knowledge, show you their setups, and help you get your first shots of the night sky. Come along to a meeting — you're very welcome whether you're a complete beginner or looking to push your imaging further.